
Query builder (ad hoc reports)
Click the  Reports icon from the
menu to display the reports menu. Click
Reports icon from the
menu to display the reports menu. Click  Custom queries from that menu.
Note: the style of your web pages may differ from the images on this help page.
For preset reports, see Help - Reports. For custom designed reports, click here or see Client-side Report Designer.
Custom Queries
After reading the below, get additional information on:
Field types and values- Understanding field types and determining field content for range selection purposes - click here
Exporting data: full support for a wide range of export solutions. Click here for more information.
Query Templates (starting late 2012). Click here to download ready-made queries.
Queries and Campaigns. Click here.
Bulk emailing - click here and click here for a detailed, step by step example.
Understanding the Query Builder
The Ad hoc Query Builder displays as a pop up. It is used for a wide range of reporting purposes and can be accessed directly or called from the Search panel in various modules via the [Advanced search] button. Output is to a variety of destinations, including a screen list display of the retrieved records. For the latter, you can then click on any row in the list to display that record in its native module.
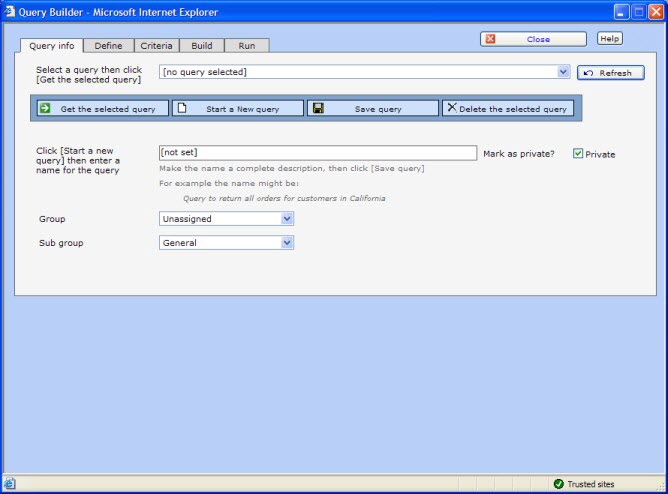
Query info tab:
Select a query from the drop down list, then click [Get the selected query]. Alternatively, [Start a New query] or [Delete the selected query]. If you start a new query, enter a query name.
Remember to [Save query] whenever you create a new or modify and existing query. Optionally, assign it to a Group and Sub group for easier lookup.
Define tab:
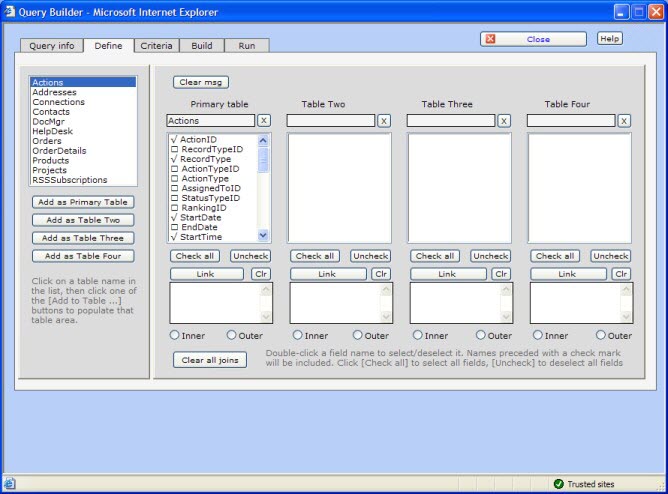
Query builder supports multiple linked queries. Click on the prime table from the list on the left then click [Add as Primary Table] to display the table's fields in the Primary table area. Add up to 3 other linked tables, if required. Remove a table by clicking the [X] button adjacent the table's name.
Select fields in the table's field list according to the fields you want in the final output by double-clicking the field name. Click [Check all] to select all the fields.
If you have more than one table, each additional table must be linked to another table. Define the links between tables
- 1. Click on one of the link fields in one table.
- 2. Click the [Link] button following the field list for that table. This message will display:
"Now select a field in the target table and click the [Link] button for that target table"
- 3. Click the field to be linked to in the other table (the "target" table) and click the [Link] button following the field list for that table.
- 4. If required, click [Inner] or [Outer] to specify the join type.
Criteria tab:
Set up the query's criteria by selecting from the drop downs and entering values as applicable. Below a record type is specified and a start date is entered (use the [...] to pop up a calendar if required):
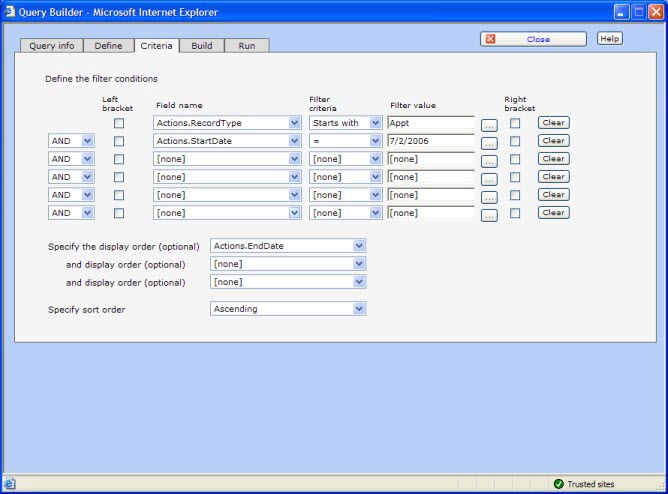
Specify other conditions: display order, sort order, if needed.
Build tab:
The query will be built based on your criteria.
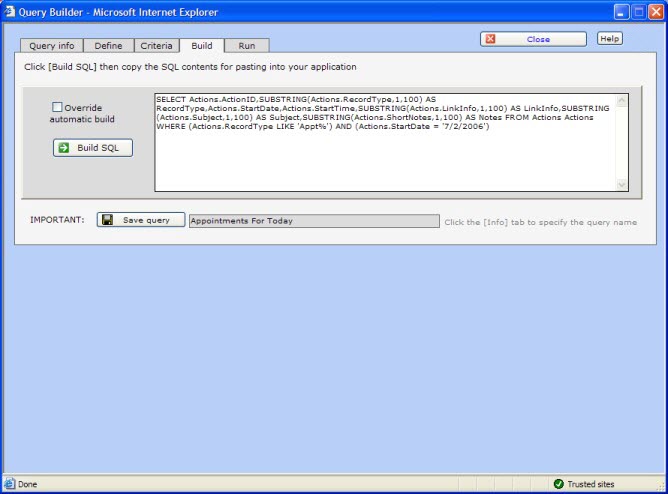
You can select the [Override automatic build] to enter your own expression, should that be necessary. For example, you might want just a count of records in a table. You could enter the following, save the query and reuse it as needed:
SELECT count(*) as reccount FROM Contacts Contacts WHERE (Contacts.AssignedToID = 2)
[Save query] to ensure your changes are preserved.
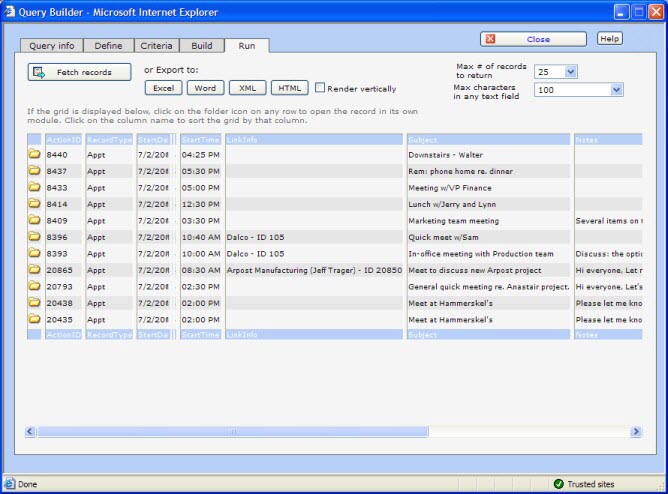
Select the type of output you require. Export your data into any of the below types:
- [Fetch records] - displays the records in an on-screen grid
- [Excel] - the report as an excel worksheet
- [Word] - the report as a Word document, fielded for uses like mail merge
- [HTML] - normal web page
- [XML] - output as XML file
Choose Render vertically if the number of fields in your report exceed the width of a display page.
Change the "Max characters in any text field" as needed.
Change the "Max # of records to return" as needed.
Below, we've selected [Fetch records] to display the records onscreen. We can then click any row and view the record in the Actions module.
Click [Query info] then save the query or cancel changes. Change the query name if desired.
Understanding field types and determining field content for range selection purposes