![]()
Click the Activities icon from the main menu to display the Activities sub menu. The Activities module is also invoked from various modules.
Use the Activities module to track all types of actions and activities. Start an activities record from a parent contact, project or help desk record to automatically link the action to that parent, or link an activities record to an existing contact and project from within the activities record itself.
For information on emailing, read through this help page for basic entry, search and similar information, then click here to go to the email help page.
Clone an activities record into another record type, including other action types, help desk and project.
| Note: repeating fonts list problem: |  |
Solution: Click here |
The Activities menu:
Standard Drill down 
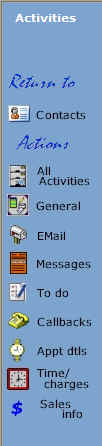
There are 7 activity types: General, for non-specific activities; EMail, Messages, for "Message for you" messaging; Callbacks, To do, Appointments, Sales info notations and one sub type: Time and Charges. For more information on sales notations, click here. Although Appointments can be created, deleted and tracked through the Activities module, we recommend you use the Activity Manager (Calendar) for this purpose.
Menu types: Standard and Drill down:
The Standard Activities menu displays when you access the Activities module directly. The Drill down menu displays when you are accessing the Activities menu via another module. For example, in Contacts, you click [Activities] and the Drill down menu will display. The same holds for Help Desk and Projects.
The Drill down menu adds the "Return to" icon which will display whatever the owner is - Contact, Help Desk or Project/Opportunity.
When the Standard Activities menu displays, you can see all Activities records assigned to you (essentially those records created by you, or escalated to you),
When the Drill down Action menu displays, you can see only those Activities records owned by the owner record. Such records may be assigned to anyone.
Click on an action type to display the Activities list.
Activities list
The action type is shown at the top of the left-side menu.
List action area:
Click [Views] to display the search panel. Click here for more information on searching.
Click [New] to open the detail form and enter a new Activities record.
Select from the Max. records to return drop down list to set the number of records returned with each data fetch.
Click on the title of any column to sort the list by that column. The display will change to show the records in either ascending or descending order. Click again to reverse the sort.
Customize the way the list displays, including column positioning, name and width and whether the column is to be displayed or hidden through the Administration module. Click here for more information.
Click [Print] to create a printable list of the currently-displayed record list. Select options to print only the columns in the displayed grid, or to display all columns in the record. Click Render vertically to change the format of the printable list.
Click (Bulk actions:) [ On/Off ] to display the bulk actions section. When this option is selected, each row in the list will contain a checkbox. Select the row(s) for which bulk actions are required:
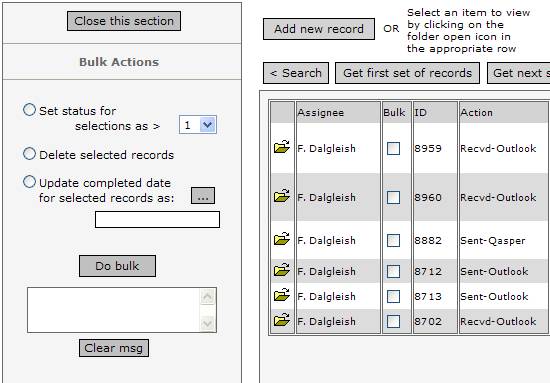
Bulk Actions:
Use this section to update all selected records.
- Set status to Open (0) or Closed (1).
- Delete the selected records.
- Update completed dates.
Searching:
Click the Search button ![]() to open the search panel. Use the search functions as needed
to display actions in various ways:
to open the search panel. Use the search functions as needed
to display actions in various ways:
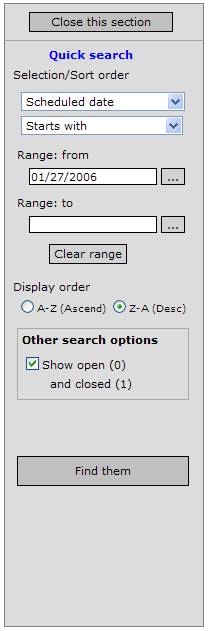
Enter/select the search criteria and click [Find them] to display the result in the grid.
Click [Get first set of records] to get the first set of records that match the search criteria. Click [Get next set of records] to get the next set.
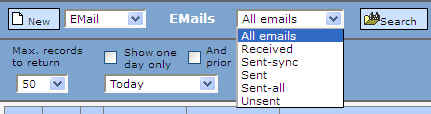
Depending on the action type, additional search refinement is available:
EMail:
Grid display:
Use the scrollbars to scroll the
list up and down, left or right. Click the folder icon ![]() on any row to display the complete detail record. Click [Add
new record] to open the detail display to add new records.
on any row to display the complete detail record. Click [Add
new record] to open the detail display to add new records.
If the list
is a pop-up from a search request, the background will be blue and
an additional icon (![]() ) will
display. Locate the row of the desired project and click that icon
to return the project information to the calling module.
) will
display. Locate the row of the desired project and click that icon
to return the project information to the calling module.
Note: You can enter appointments and activities in two areas: the Activities module and the Activity Manager (calendar/scheduling) module. Refer to the Activity Manager module's help page for more information on the latter. It's typically easier to enter appointments through the Activity Manager module, and activities through the Activities module.
Activities detail area:
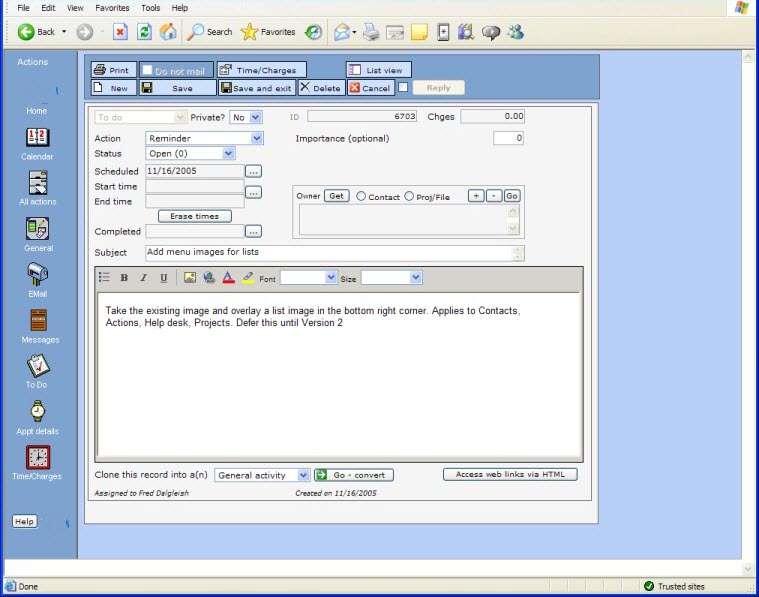

See Buttons: below for more information.
Depending on the action type, the Activities details record will display fields in different ways, and will offer specific options.
For example, the email box will display for EMail activity records:

and will show a Sent by area: ![]()
and an attachments area: ![]()
Click [Ad hoc] to directly enter an email address.
Click [Look up] to pop up either the Contacts list or the Group Builder (click here for more information on the latter). The following intermediate dialog will display:
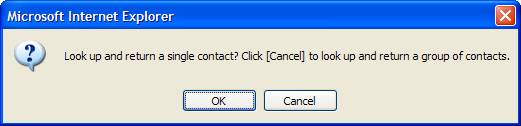
If [OK] is clicked, the contacts list will display. For more information, click here.
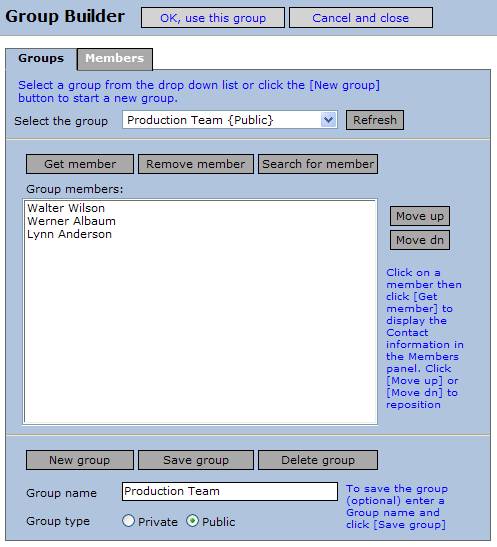
If [Cancel] is clicked, the Group Builder will display:
If the type is an appointment, the Reminder will display:
Other logical minor differences will occur, depending on the action type.
Start a new record:
Click [New] to start a new Activities record. The record must be saved or cancelled before any other functions are available (list projects, documents, etc.). Click [Save] to save the record. A dialog will display if there are any errors requiring correction, or if there were no changes detected.
Click [Cancel] to cancel current
changes. Alternatively, click in the checkbox ![]() beside the [Cancel] button to automatically cause cancellation when
the next action is taken. This is a quick way to move to another
function without having to press the [Cancel] button.
beside the [Cancel] button to automatically cause cancellation when
the next action is taken. This is a quick way to move to another
function without having to press the [Cancel] button.
Click [Display List >] or to return to the Activities list.
Entering information:
An ID # will be automatically assigned when the record is saved.
Select Yes or No for "Private?". Select the appropriate dropdown selection from the various lists, as required.
Use the [...] buttons adjacent to the Date and Time fields to enter "Scheduled date" and "Completed date" (or their equivalents, depending on the action type_, "Start time" and "End time". Click [Erase times] (if visible) to clear the time entries.
Continue through the fields, entering information as needed. For certain fields, like Description and Notes, the module will automatically change the character case to form proper sentences when you save the record, so you can enter everything in lower case if you wish.
If the action type is an appointment, complete the Send Meeting EMails section and send emails requesting attendance. As respondents answer, the drop down list items will show either Confirmed or Denied.
If the Activities type is an email, an attachments area will display.
You can add any number of attachments. Click the drop down list to view them. Click [Docs] to open the Document Manager list, [Cat] to open the Catalog Manager list and [-] to remove the displayed attachment.
Ensure your email addresses are entered. See Help - Modules - Home - Emails for more information.
If this Activities record is being created via a parent record (contact or project), the Owner section of the above box will automatically be completed.
[Get] - Pop up the contacts list to locate and select a contact. Click here to see pop up info above. The contact's key information will be automatically entered.
[ + ] - If you have previously done a contact lookup, it will be memorized. You can click this button to display the full set of memorized fields, and to automatically enter the key information.
[ - ] - Remove the contact information.
O Contact O Proj/File - select the type of owner
[ Go ] - Leave this module and open the contact record.
Co-owner:
Frequently, an activity may have two key owners - a prime and a secondary owner. The Co-owner area is provided for the secondary owner, should you wish to have one.

Send to:
[Ad hoc] - Click to directly enter an email address
[Look up] - Open the contact list display
[ + ] and [ - ] - as above
[ ? ] - Display full details on the email address.
Copies to: Same as Send to:
Other fields:
This option allows you to use the current action's record as a template to create any other type of record, for example, the options offered are:
If you select one of the options and click [Go - convert], a pop-up will display with the chosen record type already filled in with as much information as can be taken from the Action record.
Custom fields:
If custom fields have been defined, they will be to the right of the dotted vertical line. Press the [tab] key after the last email entry, or use the horizontal scrollbar to move to the custom field area.
[Print] - Print the current record.
[Display List >] close the detail screen and display the list.
![]() - If the Notes content contains some web links, click this button to
allow those links to be clicked on.
- If the Notes content contains some web links, click this button to
allow those links to be clicked on.
![]() - Display the Time/Charges panel:
- Display the Time/Charges panel:
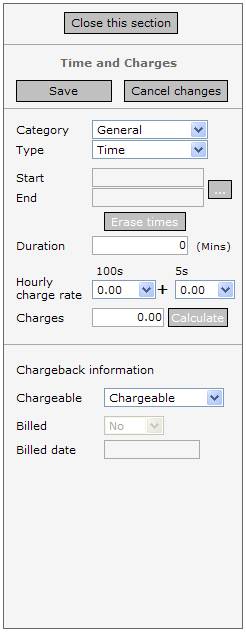
Click [Close this section] to close the Time/Charges form. Select a category and type from the drop down lists. Set Start/End time. [Erase times] if necessary.
Duration is automatically calculated. Hourly charge rate is automatically determined from the entry on your Home page. See Help - Modules - Home - Scroll down to [Preferences] ...
Hourly charge rate can be manually entered. If the type is Expense, enter Charges directly. Click [Calculate] to calculate charges if type is Time. Select Chargeable type. Billed and Billed date are completed by the billing action and cannot be changed.
Click [Save] or [Cancel changes] as required.